« Previous -
Version 10/15
(diff) -
Next » -
Current version
J. Simmons, 02/04/2018 09:12 pm
Tone Ring Assembly
Tools
- Holoseat Test Stand
Materials
- (optional) Instant/super glue (prefer Loctite Super Glue Ultragel Control)
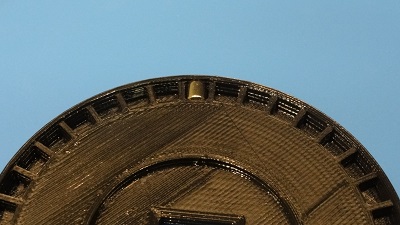
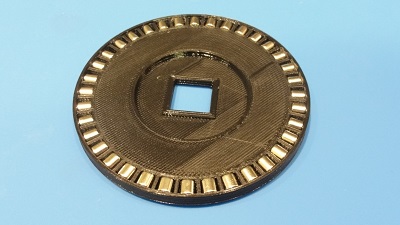
- (1) 18PTR-01: 18 Pole Tone Ring Base
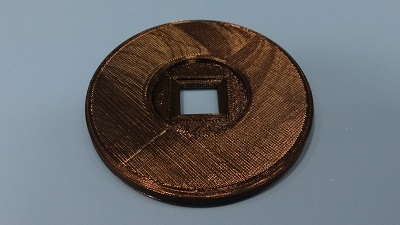
- (1) 18PTR-02: Tone Ring Cover
- (36) 18PTR-03: N52 3/16" x 3/16" Neodymium Cylinder Magnets
Safety Issues
- Use safety glasses when working with small, high powered magnets to avoid eye injury from flying magnets
Product
HS-03: 18 Pole Tone Ring
Procedure
1. Place Magnets
- TBD
3. Verify Magnet Placement
- Set up the Holoseat Test Stand
- Ensure the calibrated sensor is attached to the sensor controller
- Ensure the power and USB connections are all configured according to the test stand operating instructions
- Place the new tone ring onto the tone ring adapter
- Run test
- Clear the sensor stats
- Run the stepper motor 1 revolution, in a CW direction, at 30 RPM
- Get the sensor stats and verify the number of reported poles is 18
- Remove the tone ring from the tone ring adapter
4. Complete the Tone Ring
- Align and place the 18PTR-02: Tone Ring Cover over the 18PTR-01: 18 Pole Tone Ring Base
- Press the parts firmly to secure the cover to the base