« Previous -
Version 13/49
(diff) -
Next » -
Current version
Jeremy Wright, 09/21/2012 11:00 pm
Operating Manual v1.0
Hardware Operation
Unpacking After Transport
- Check shipping container(s) for:
- Test stand
- Concrete block
- Box of accessories
- Launch controller
- D motor spacer ring
- Motor mount adapters (A, B, and C to D/E size)
- Thermocouple attachment tape (high temp)
- Computer and USB cable
- Motors to test (with igniters and igniter plugs)
- Fire extinguisher and maybe a bucket for water
Test Stand Setup
- Place concrete block in location where test stand will be operated
- Set test stand on concrete block
- Create the safety perimeter.
- Delineate no stand zone for both proximity and positions
- Use length of cord for the igniter (radius of operations)
- Exclusion zones exist behind where exhaust escapes (30 degree cone), and in front on each side of the exhaust T (30 degree cone on each side)
- Delineate no stand zone for both proximity and positions
- Set up the management area for test.
- Igniter
- Clip the igniter to a part of the test stand and deploy the cable to its full length and place it where the test(s) will be run from
- Computer
- Set up computer
- Boot computer
- Run USB cable from computer to test stand
- Connect Arduino-based DAQ system to USB cable at test stand
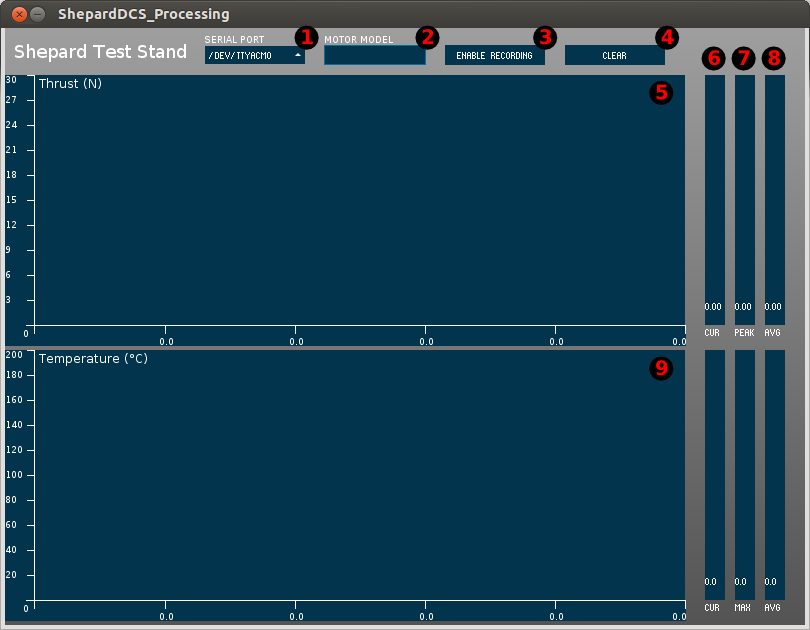
- Start the Test Stand App
- Ensure DAQ system and Computer are both running and connected
- Igniter
Prepare For Test*
- Test sensors
- Push on thrust sensor and confirm current value slider responds
- Put fingers around thermocouple(s) (after ensuring it is not hot) and confirm plot responds
- Install motor in test stand
- A-C Motors
- Attach thermocouple(s)
- Insert igniter into motor and cap with igniter plug, making sure to space leads
- Install the motor in an adapter
- Insert D spacer ring into the motor mount
- Insert the motor assembly into the motor mount so a notch from the adapter lines up with the clip on the motor mount so it clicks into place
- D Motors
- Attach thermocouple(s)
- Insert igniter into motor and cap with igniter plug, making sure to space leads
- Insert D spacer ring into the motor mount
- Insert the motor into the motor mount, pushing it all the way into the the motor mount, note the clip should close
- E Motors
- Attach thermocouple(s)
- Insert igniter into motor and cap with igniter plug, making sure to space leads
- Insert the motor into the motor mount, pushing it all the way into the the motor mount, note the clip should close
- A-C Motors
- Double check that the range is actually clear
- Set up igniter
- Make sure the firing pin is not in place
- Connect alligator clips from Launch Controller to the igniter (one to each lead)
- At this point the range is hot (ready to fire)
Perform Test (Fire Motor and Take Data)*
- Hit button to enable recording
- Insert firing pin into Launch Controller
- Check for continuity by pressing on firing pin (light will turn on)
- Count down
- Press ignition button (may have to hold it down for a second)
- At the end of the firing, remove the firing pin from the Launch Controller
Post Test Duties*
- Remove motor and prepare for disposal
- Wait several minutes before removing the motor to allow it to cool down to a safe handling temperature
- Remember to also remove the D space ring if the motor was D size or smaller
- Remember to find the igniter (it should still be attached to the alligator clips) so it can be properly disposed
- For C size motors and smaller, be sure to recover the motor adapter
- Store spent motors away from flammable material during future tests
- Check to make sure that data was autosaved to the "data" directory.
Post Operations Duties (After Firing All Motors)
- Dispose of motor(s), being careful to observe all state, federal, and local guidelines.
- Rinse motors in water to ensure they are completely cooled before disposal
- Throw the motors away according the manufacturer’s recommendation
- Pack up the accessories
- Pack up the computer
- Pack up the test stand and block
Note: If performing multiple tests during the same setup, repeat the steps with an asterisk (*) for each test.
Software Operation
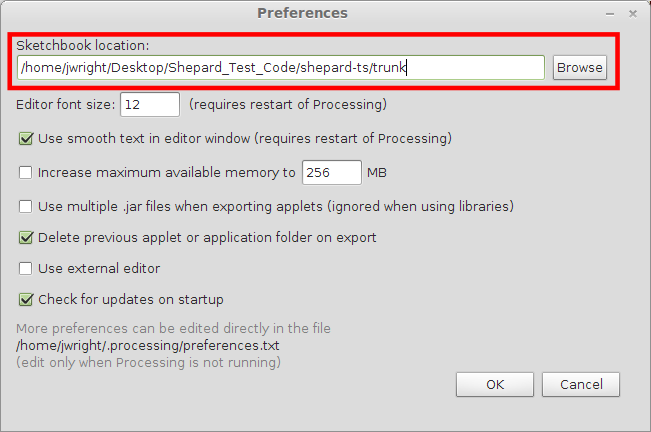
For instructions on how to download and install the Shepard data acquisition (DAQ) software, please see the Software Source Code section of the wiki.